
SPC (stone plastic composite) flooring is one of the top flooring choices for homes and commercial spaces. Its durability, water resistance, and low maintenance make it ideal for busy households and humid environments. Whether you’re planning to install it yourself or hire help, this guide walks you through each step of the process.
Preparing Your Space for SPC Flooring Installation
Before installation, it’s important to get the area ready. The subfloor must be smooth, dry, and clean. Remove any old flooring, dust, or glue. A well-prepared surface helps the planks lock together properly and prevents issues later on.
A smooth subfloor also supports the longevity of the floor, something especially important in high-use areas like living rooms or entryways. If you’re updating spaces during kitchen renovation services, it’s a good time to prep for flooring as well.
Tools and Materials You’ll Need
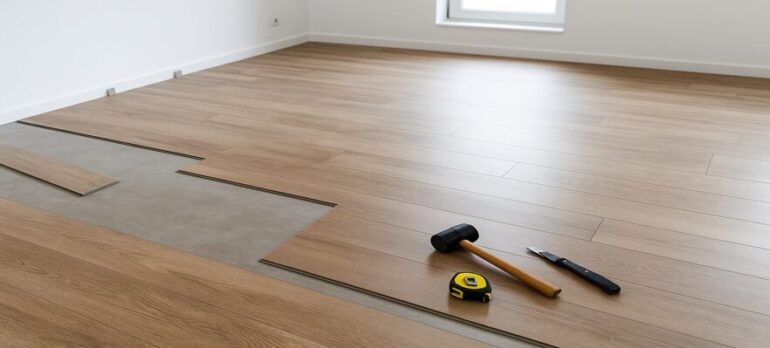
To make the installation process smoother, gather the right tools before you begin. You’ll need:
- Measuring tape
- Rubber mallet
- Spacers
- Utility knife
- SPC flooring planks
Depending on your floor type, you might also need underlayment. This adds a layer of moisture protection and can improve comfort underfoot, especially in cooler months. It’s similar to how tiling and waterproofing services add extra protection in wet areas.
How to Install SPC Flooring Step by Step
Once you’re ready, follow these simple steps:
- Measure the room to estimate how many planks you’ll need.
- Lay the first row starting from a corner. Make sure it’s straight.
- Click the planks together using a rubber mallet to lock them tightly.
- Continue row by row, checking that each piece is aligned.
- Cut the final row to fit the space neatly using a utility knife.
- Leave a gap around the room’s edges for natural expansion.
Think of it like fitting together a jigsaw puzzle—each piece has its place, and with care, you’ll end up with a smooth and polished finish. This attention to detail is similar to what’s needed during flooring renovation services, where exact cuts and clean lines matter.
Mistakes to Avoid During Installation
Avoiding errors can save you from future problems. Some common mistakes include
- Forgetting to leave expansion gaps around the edges
- Misaligned rows that cause uneven surfaces
- Skipping underlayment in areas prone to moisture
Many floor problems later on come from poor preparation or rushed installation. Take your time and double-check each row before moving on.
DIY or Hire a Professional?
While SPC flooring is considered beginner-friendly, it still requires patience and accuracy. If you’re uncomfortable with cutting planks or working around corners, calling in a professional is a smart option, especially for larger spaces or open-plan areas.
Some homeowners combine flooring work with broader home renovation services, saving both time and cost when handled together by experienced contractors.
Caring for Your SPC Flooring After Installation
Once the flooring is in place, caring for it is simple. Vacuum or sweep regularly to keep away dirt and dust. Wipe up any spills immediately with a soft cloth. Avoid strong chemicals that can wear down the surface. A slightly damp mop now and then will help keep it looking fresh.
With the right care, your SPC flooring will continue to look good and last for years.
Final Thoughts
Installing SPC flooring in your Auckland property is a great way to improve your space with a durable and attractive finish. Whether you take on the job yourself or hire a professional, following each step carefully makes a big difference.
Need help with your flooring project? Contact Quik Solutions to make the job easier and stress-free. Get in touch with our team today.